Connect SMARTplayer #

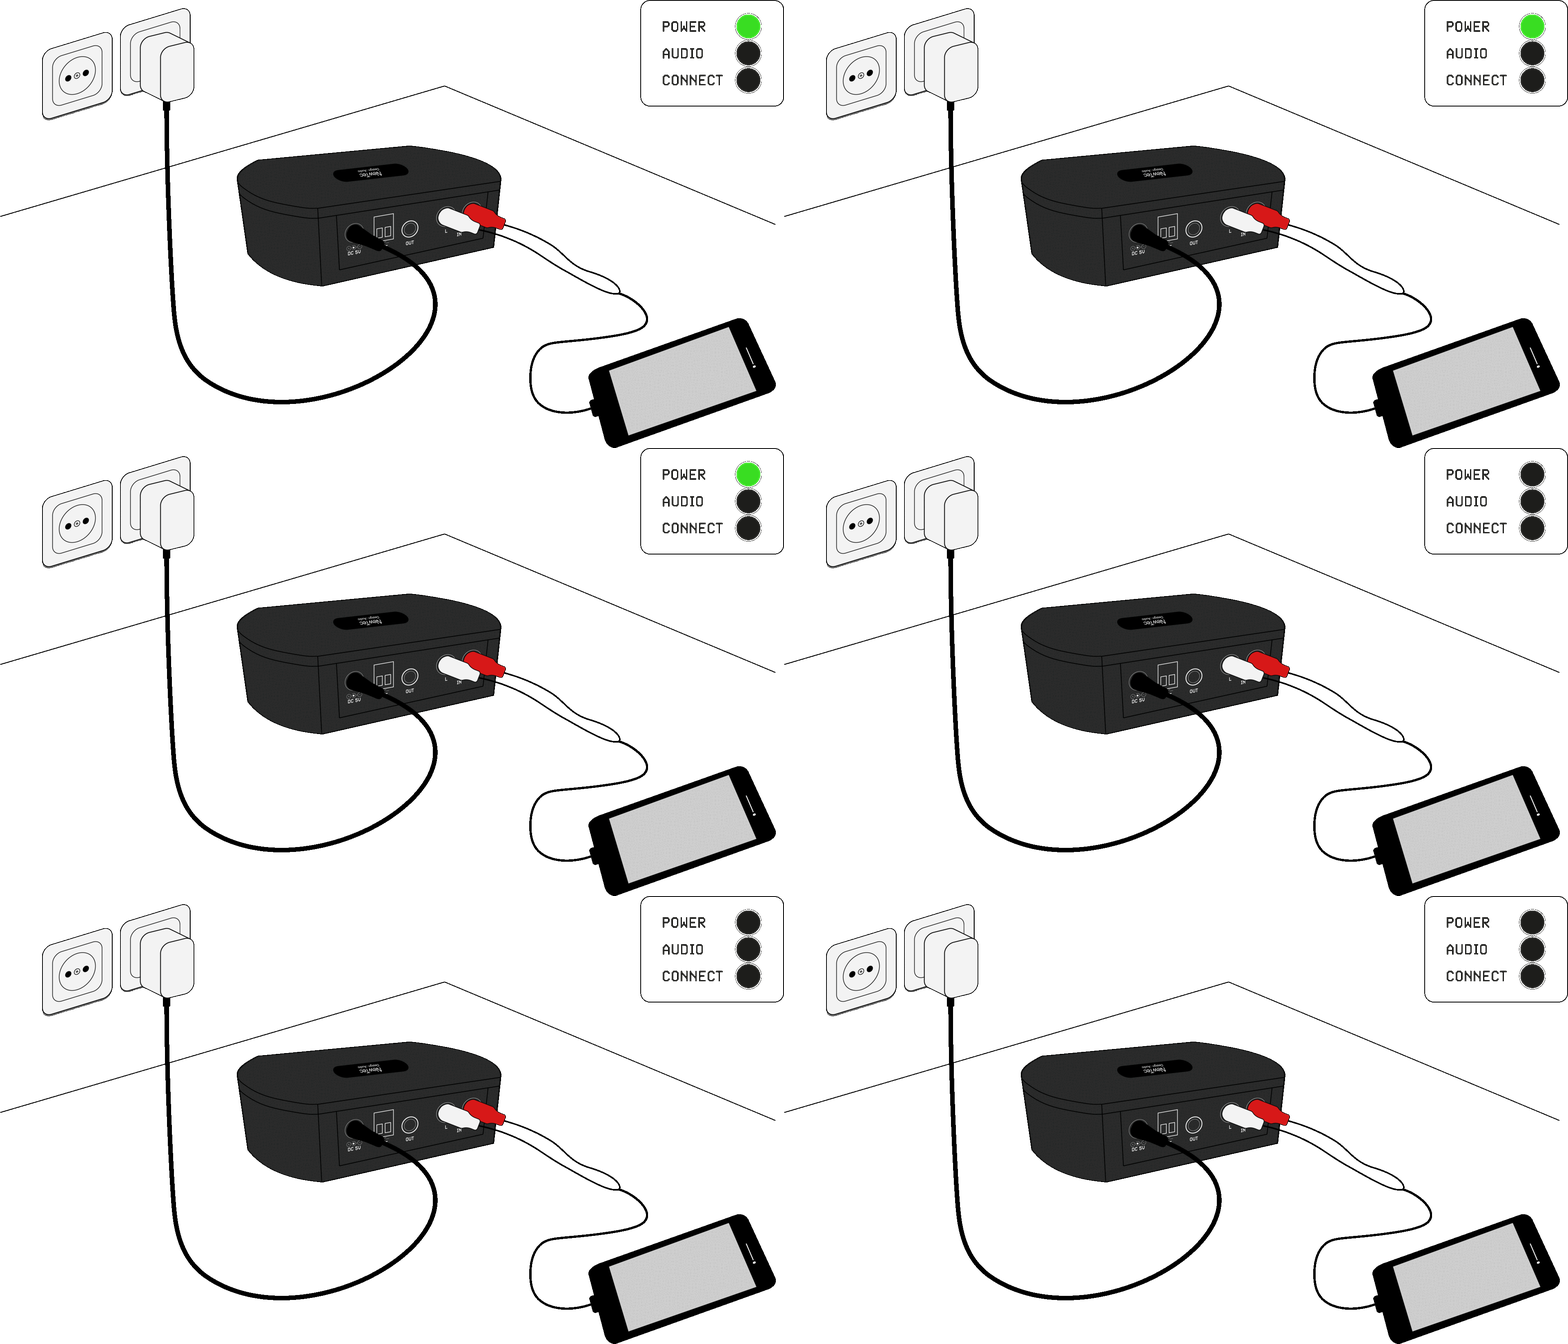
Connect the SMARTplayer to a power outlet using the included power adapter. Then connect your preferred audio source to the audio input (IN).
Activate pairing #

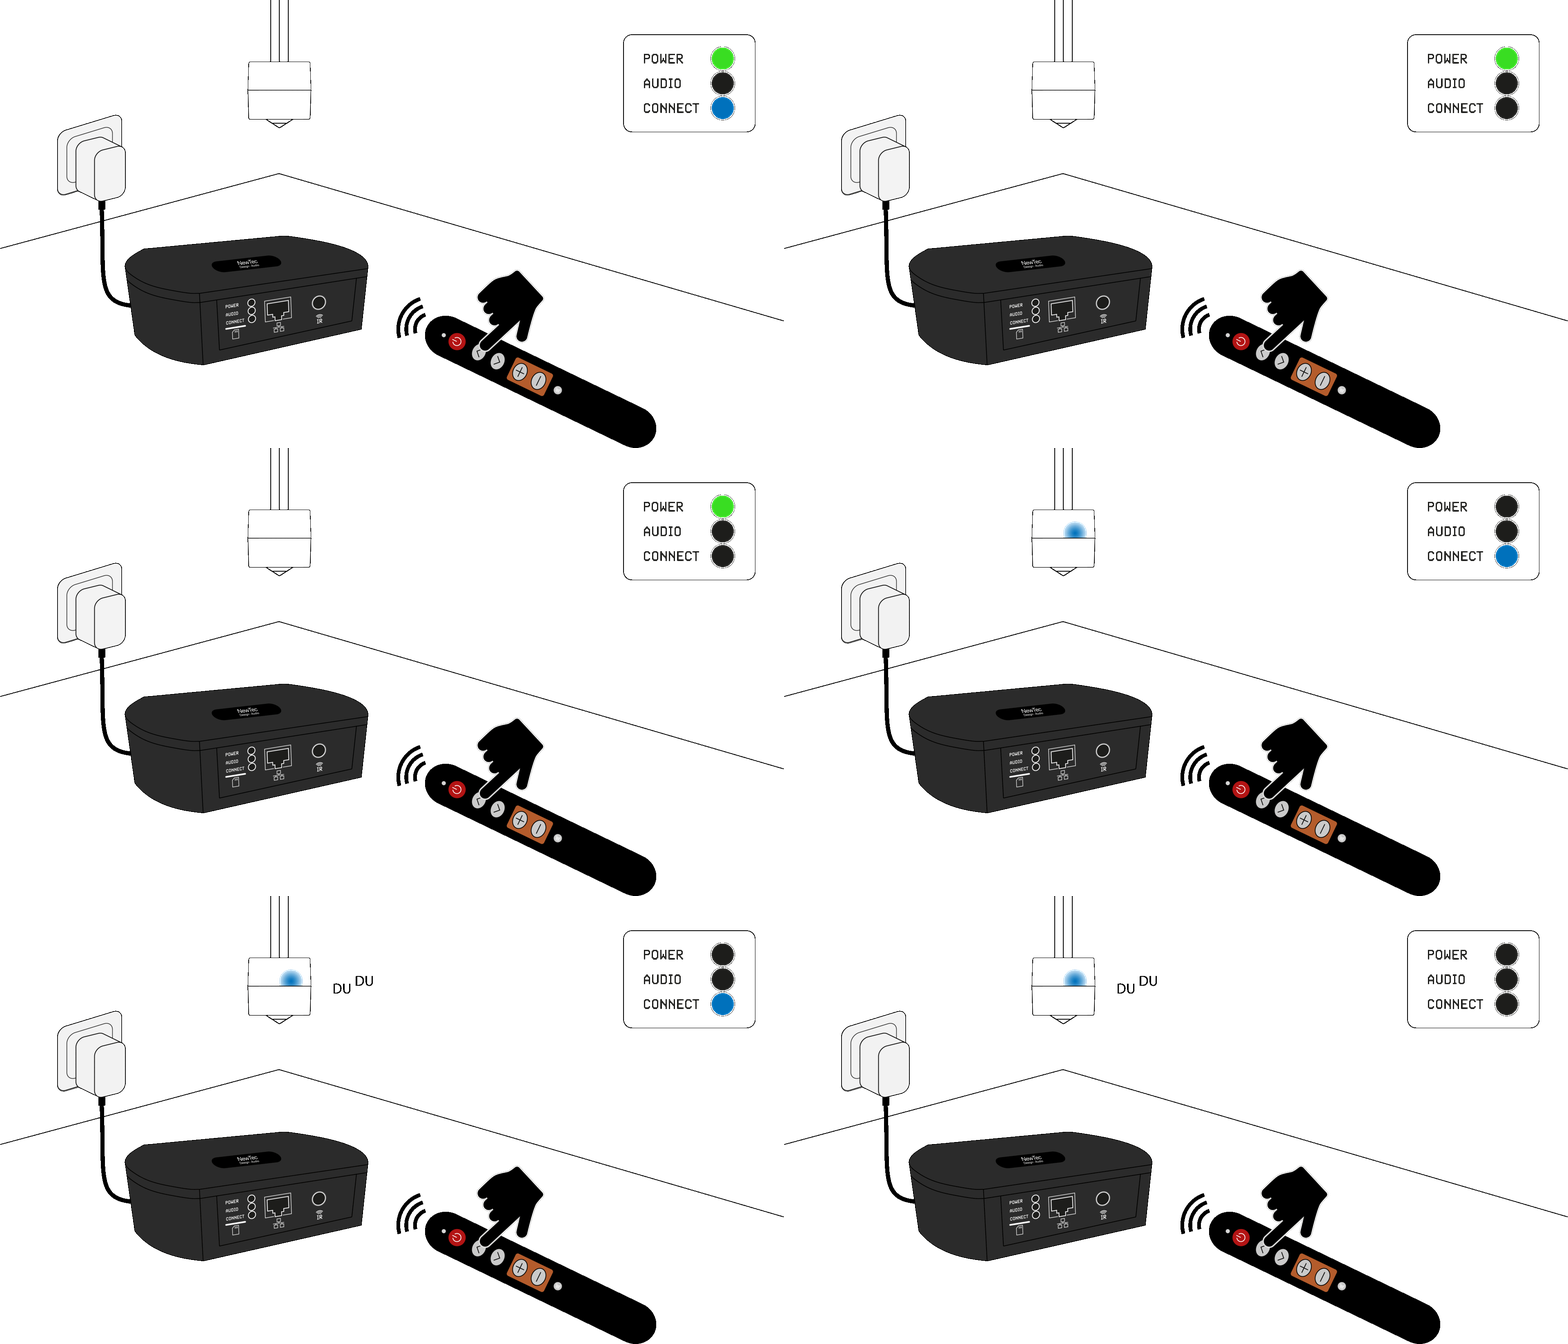
Make sure the POWER LED on the SMARTplayer is flashing green and all speakers emit a detection tone. Point the remote control at the SMARTplayer and press “CH UP” (up arrow). The CONNECT LED will flash blue, and all speakers within range will connect automatically.
End pairing #

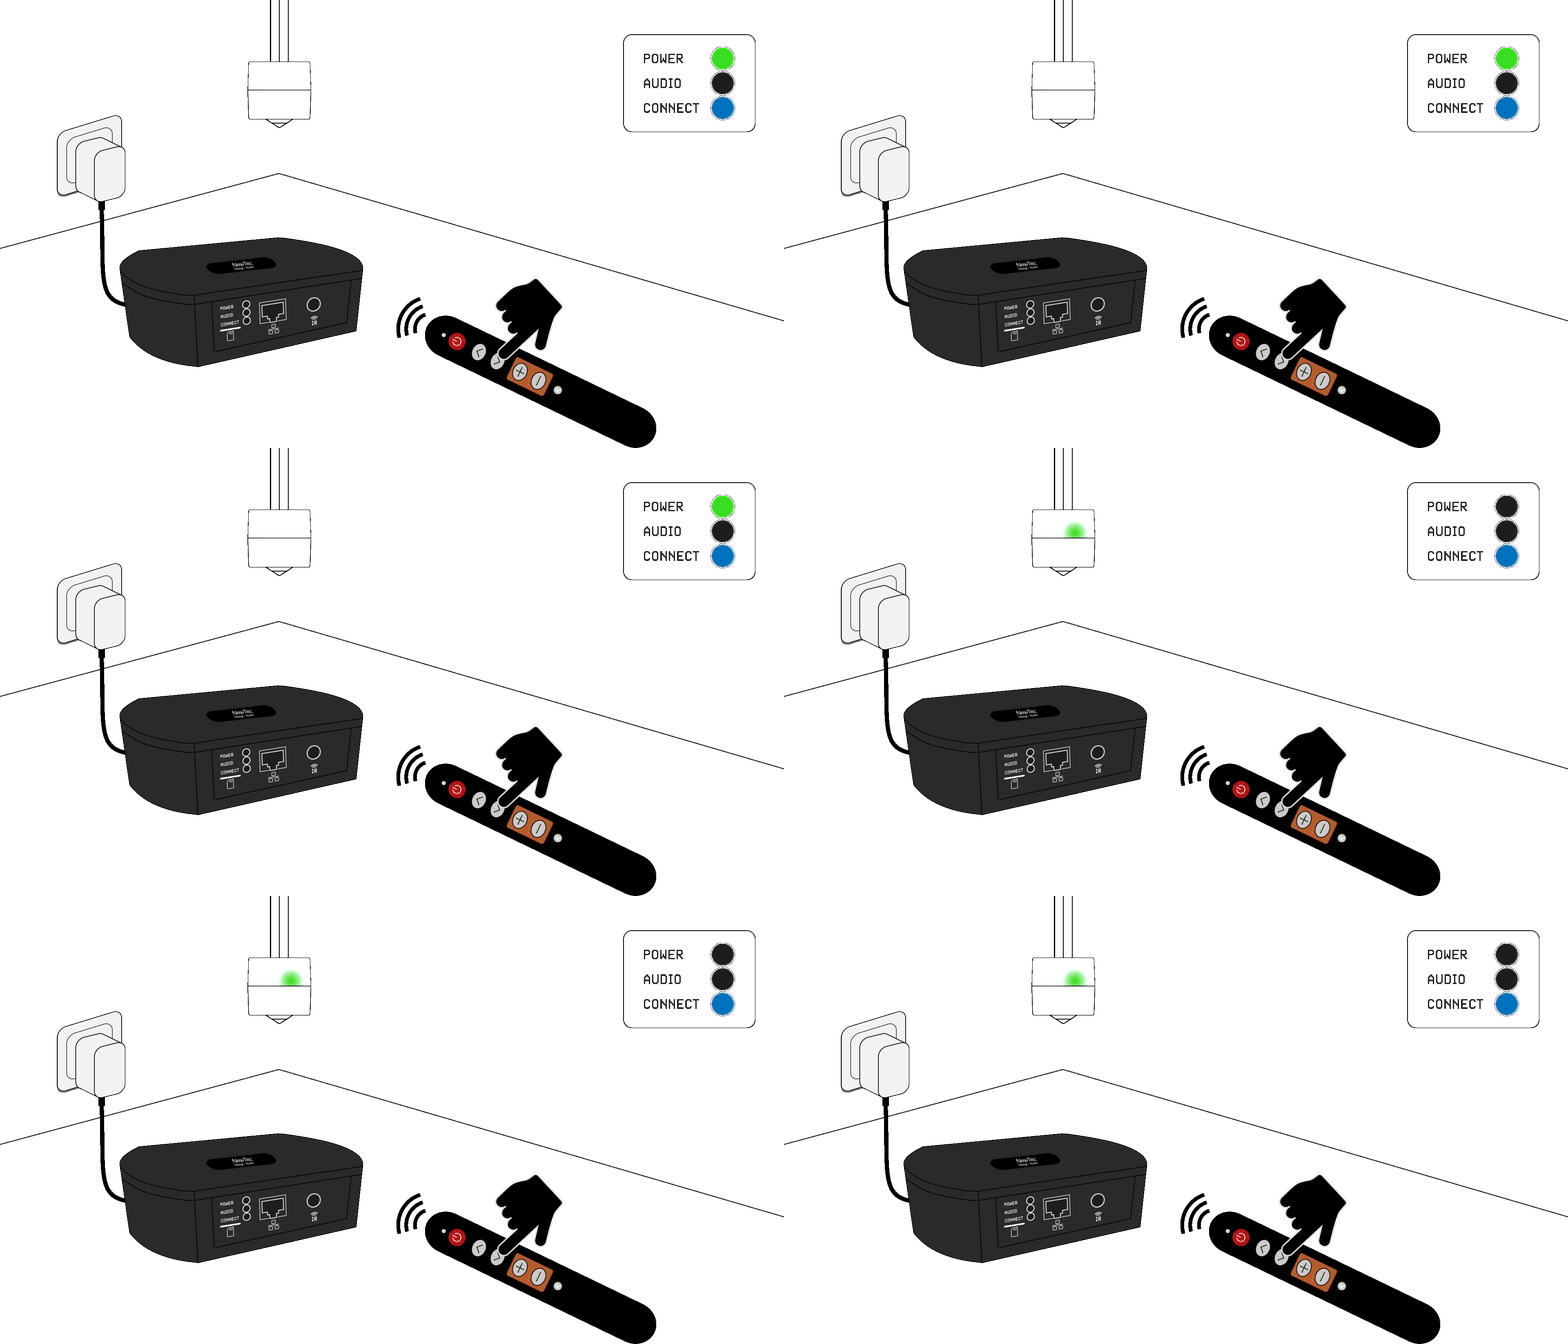
Wait until all speakers stop emitting the detection tone. Then point the remote control at the SMARTplayer and press “CH DOWN” (down arrow). The CONNECT LED will now stay solid blue – the speakers are successfully connected.
Important note: The SMARTplayer automatically exits pairing mode after about 2 hours. If installation takes longer, you can reactivate pairing mode using the remote control.
Start music playback #

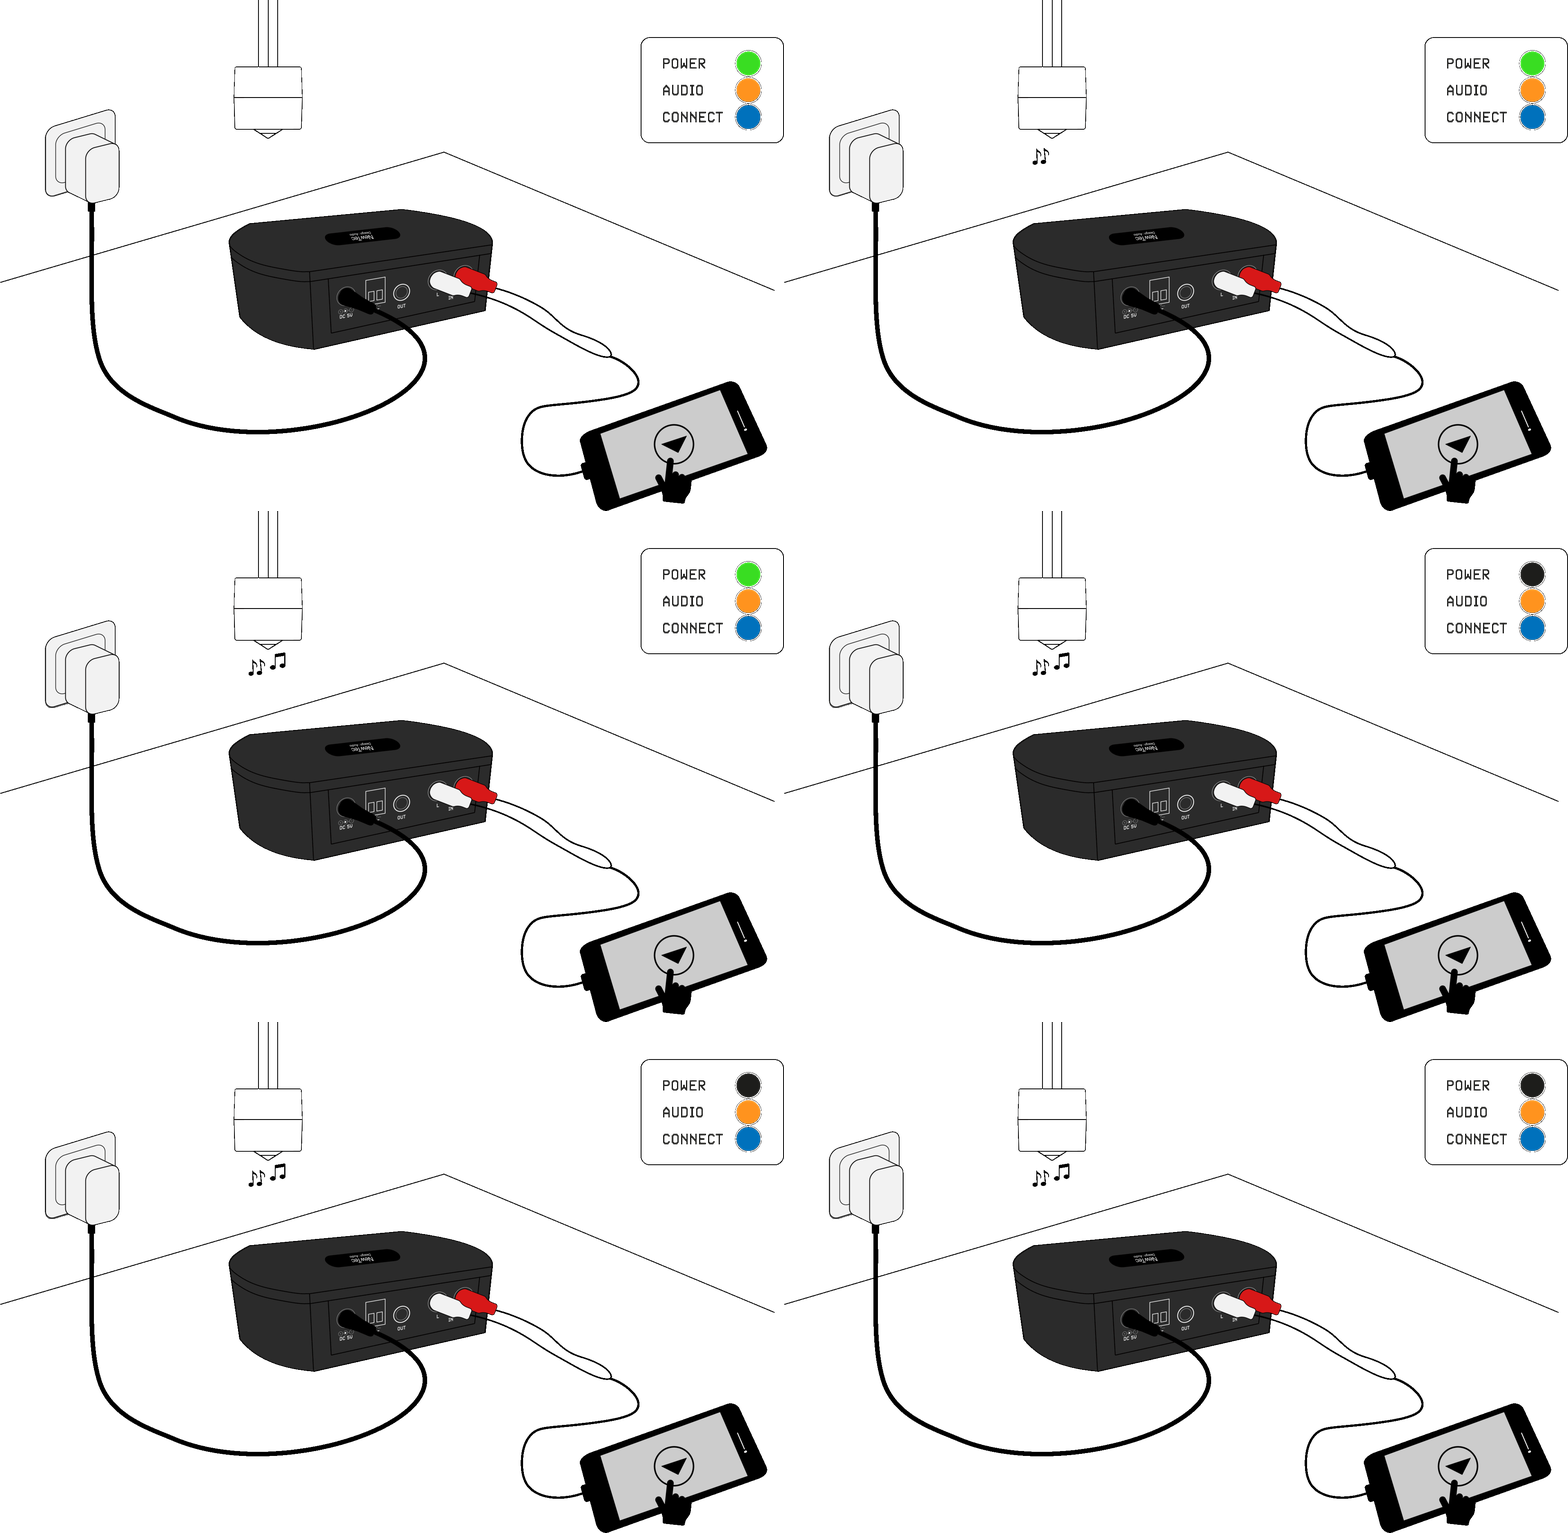
Start playing your music. The AUDIO LED will light up orange, and the audio signal will be sent to all connected speakers. You can adjust the volume either from your audio source or with the remote control (VOL +/–).
More information about the status LEDs
Setting up multiple SMARTplayers #
First, connect SMARTplayer 1, link it to an audio source, and start playback. Put SMARTplayer 1 into pairing mode and install only the speakers that should connect to it. Once the speakers are successfully paired, end pairing mode. Then repeat the process with SMARTplayer 2 and its assigned speakers, and so on.
Important note: When setting up SMARTplayer 2, make sure SMARTplayer 1 is powered on but not in pairing mode (CONNECT LED solid blue). This prevents speakers from accidentally pairing with the wrong SMARTplayer.
Click here to watch the video on how to set up the SMARTplayer.